

Cloud scan setup: Azure
⚠️ Prerequisites: To install cloud scanning for Microsoft Azure, you must have :
Servers and/or virtual machines hosted in the cloud And an administrator account
If you only have Office365 or Entra ID licences, read 👉 Cloud scan setup: EntraID
Configuration: Listed below, a technical advisor is required.
Supervision: A technical advisor is required to correct vulnerabilities throughout the year.
Here are the deployment steps, detailed with screenshots at each stage:
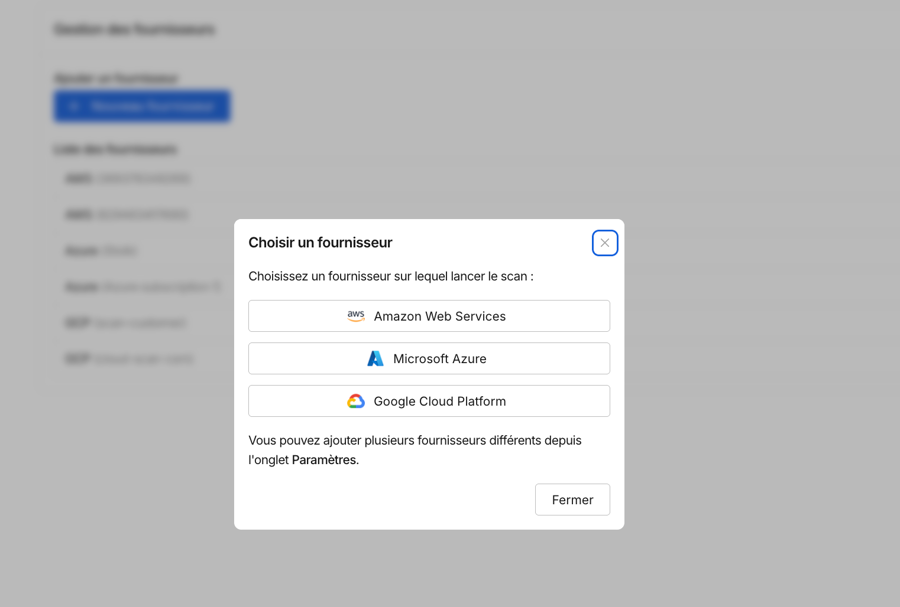
1. Select Microsoft Azure
Go to the Cloud Scan tab, then Settings, then click New Provider and Microsoft Azure.
2. Create new roles
Here is a summary of the different steps to create new roles
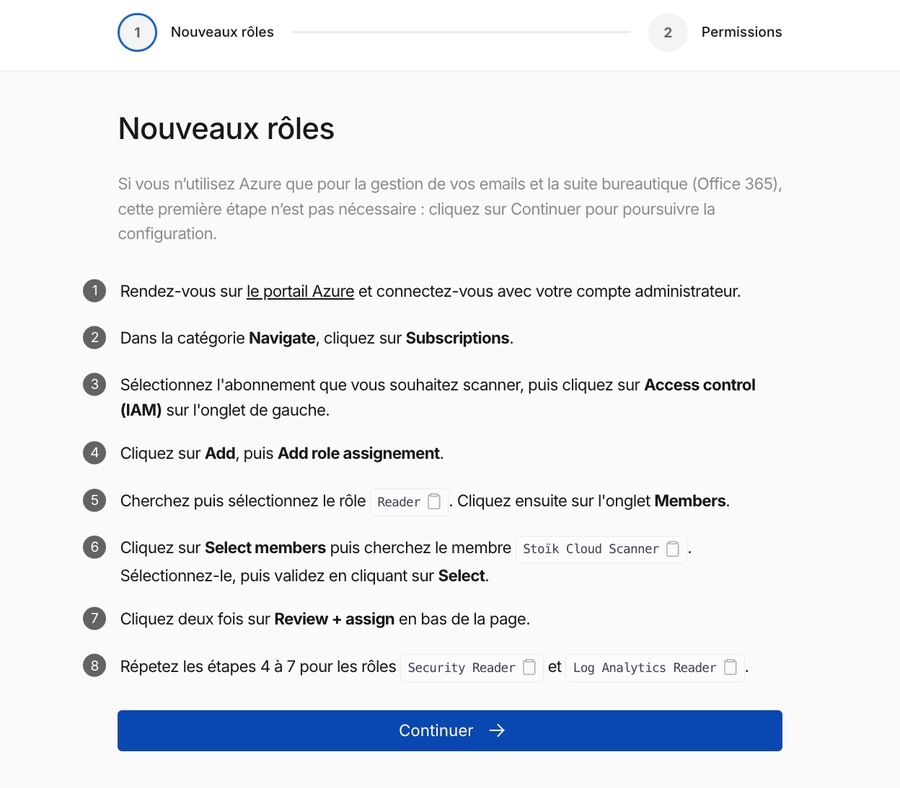
STEP 1: Go to the Microsoft Azure portal and log in with your administrator account
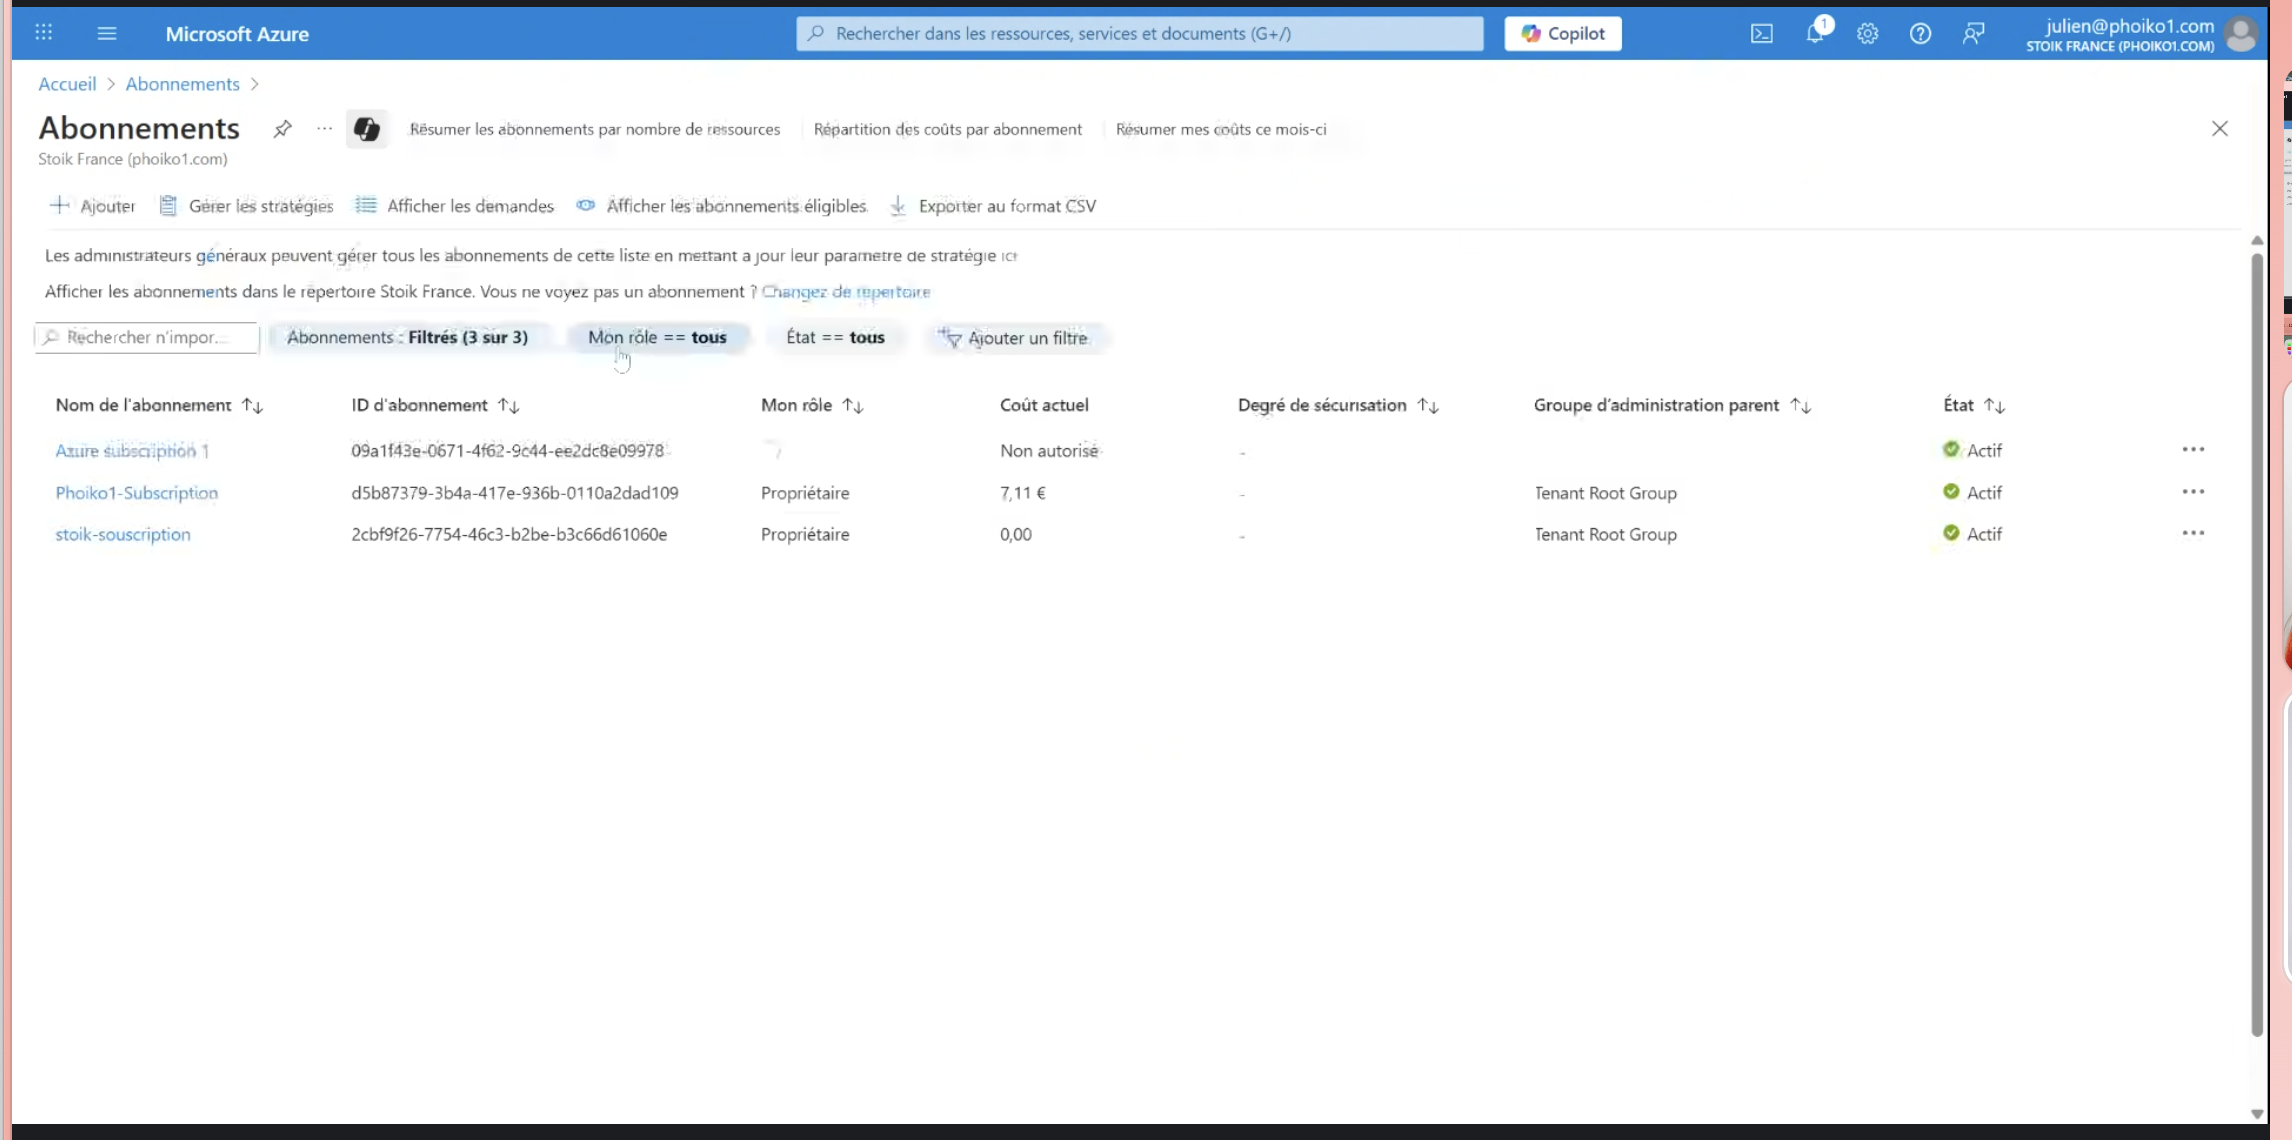
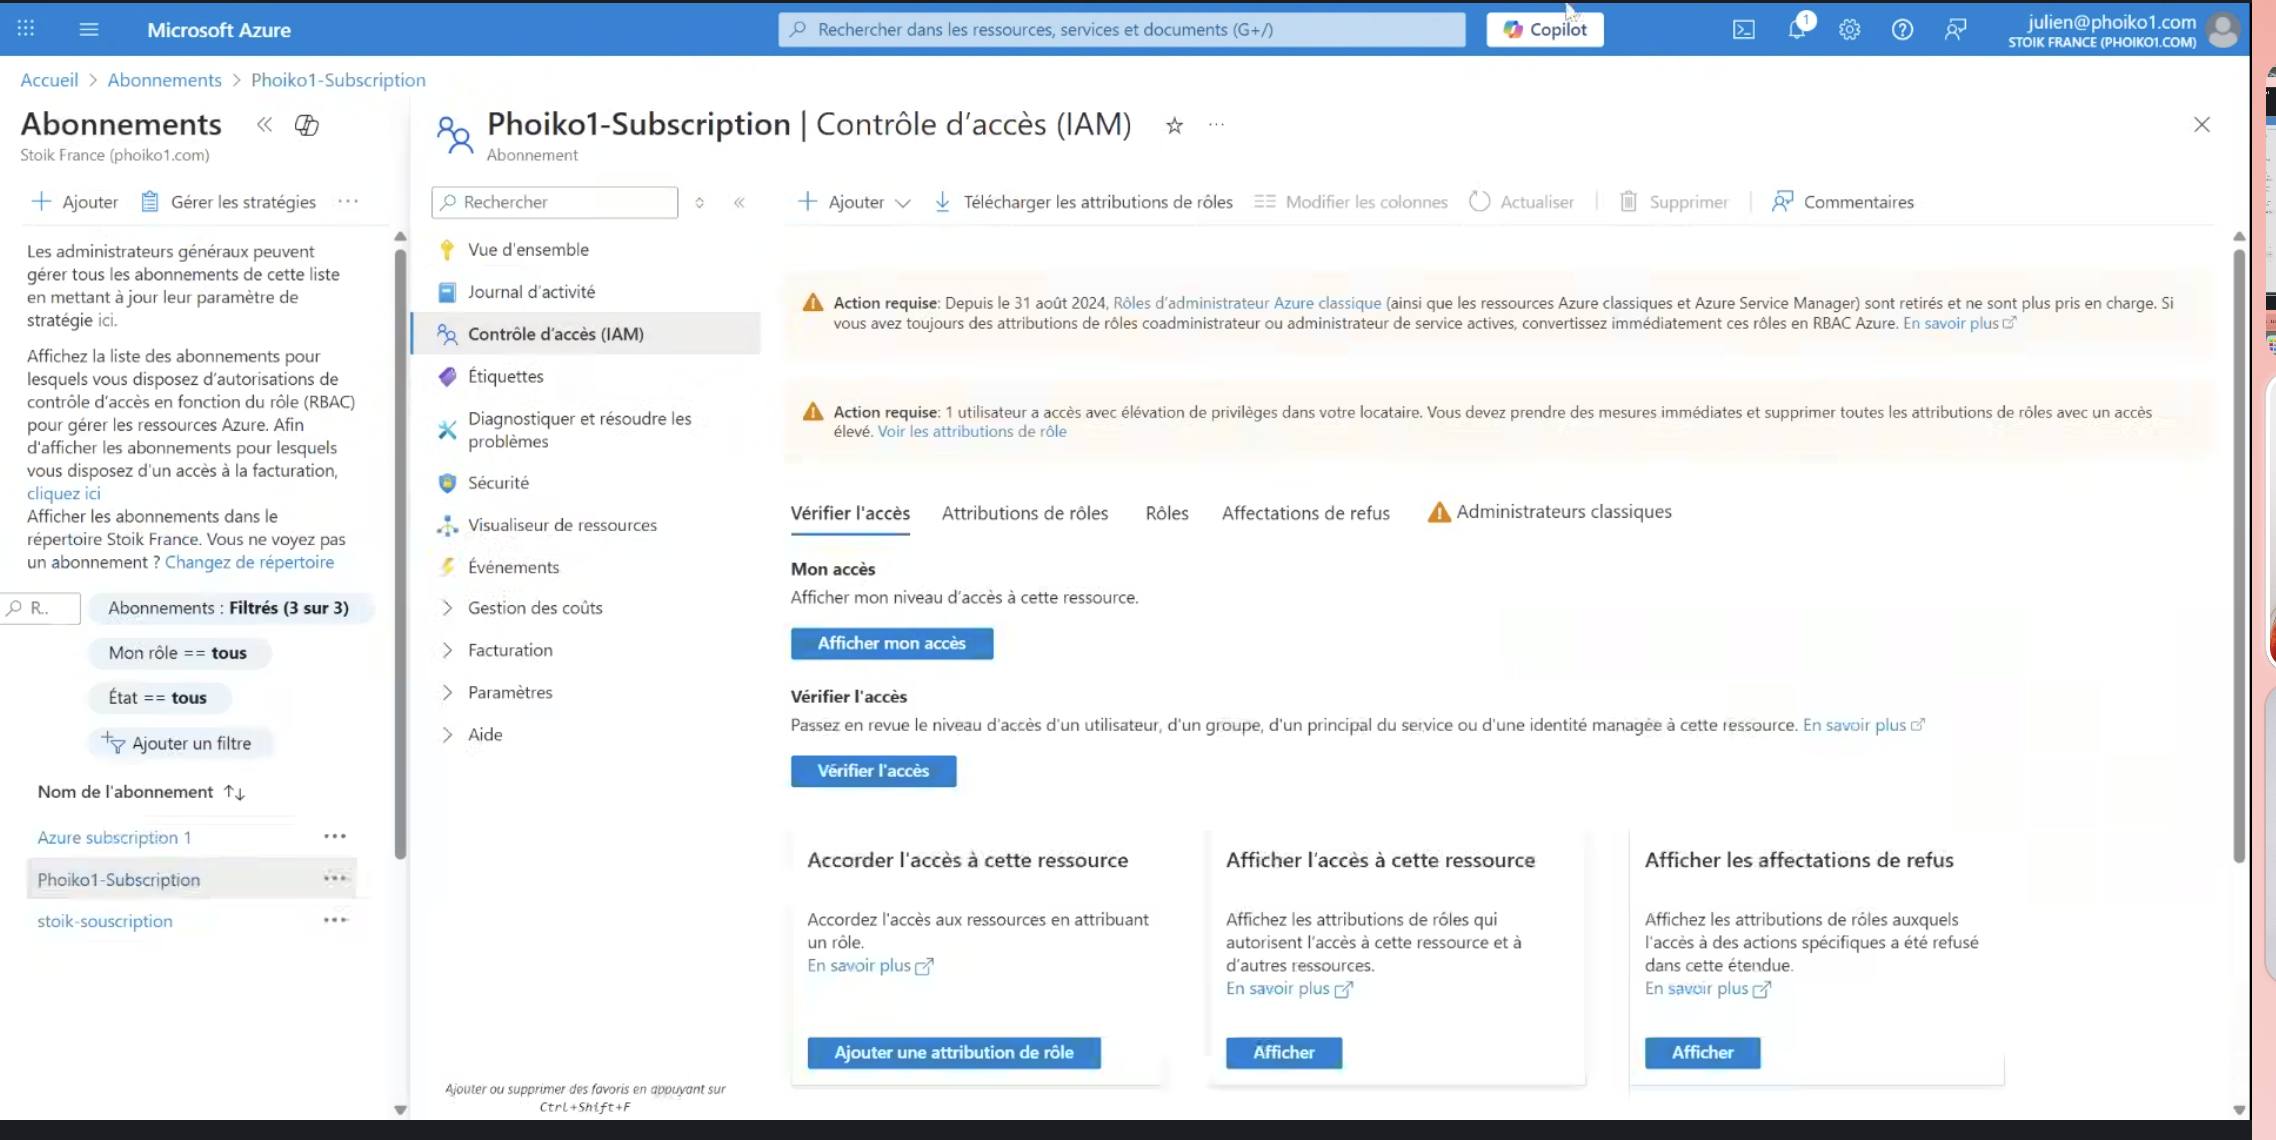
STEP 2: In the search bar, search for and click on Subscriptions, then click on the subscription you want to scan.
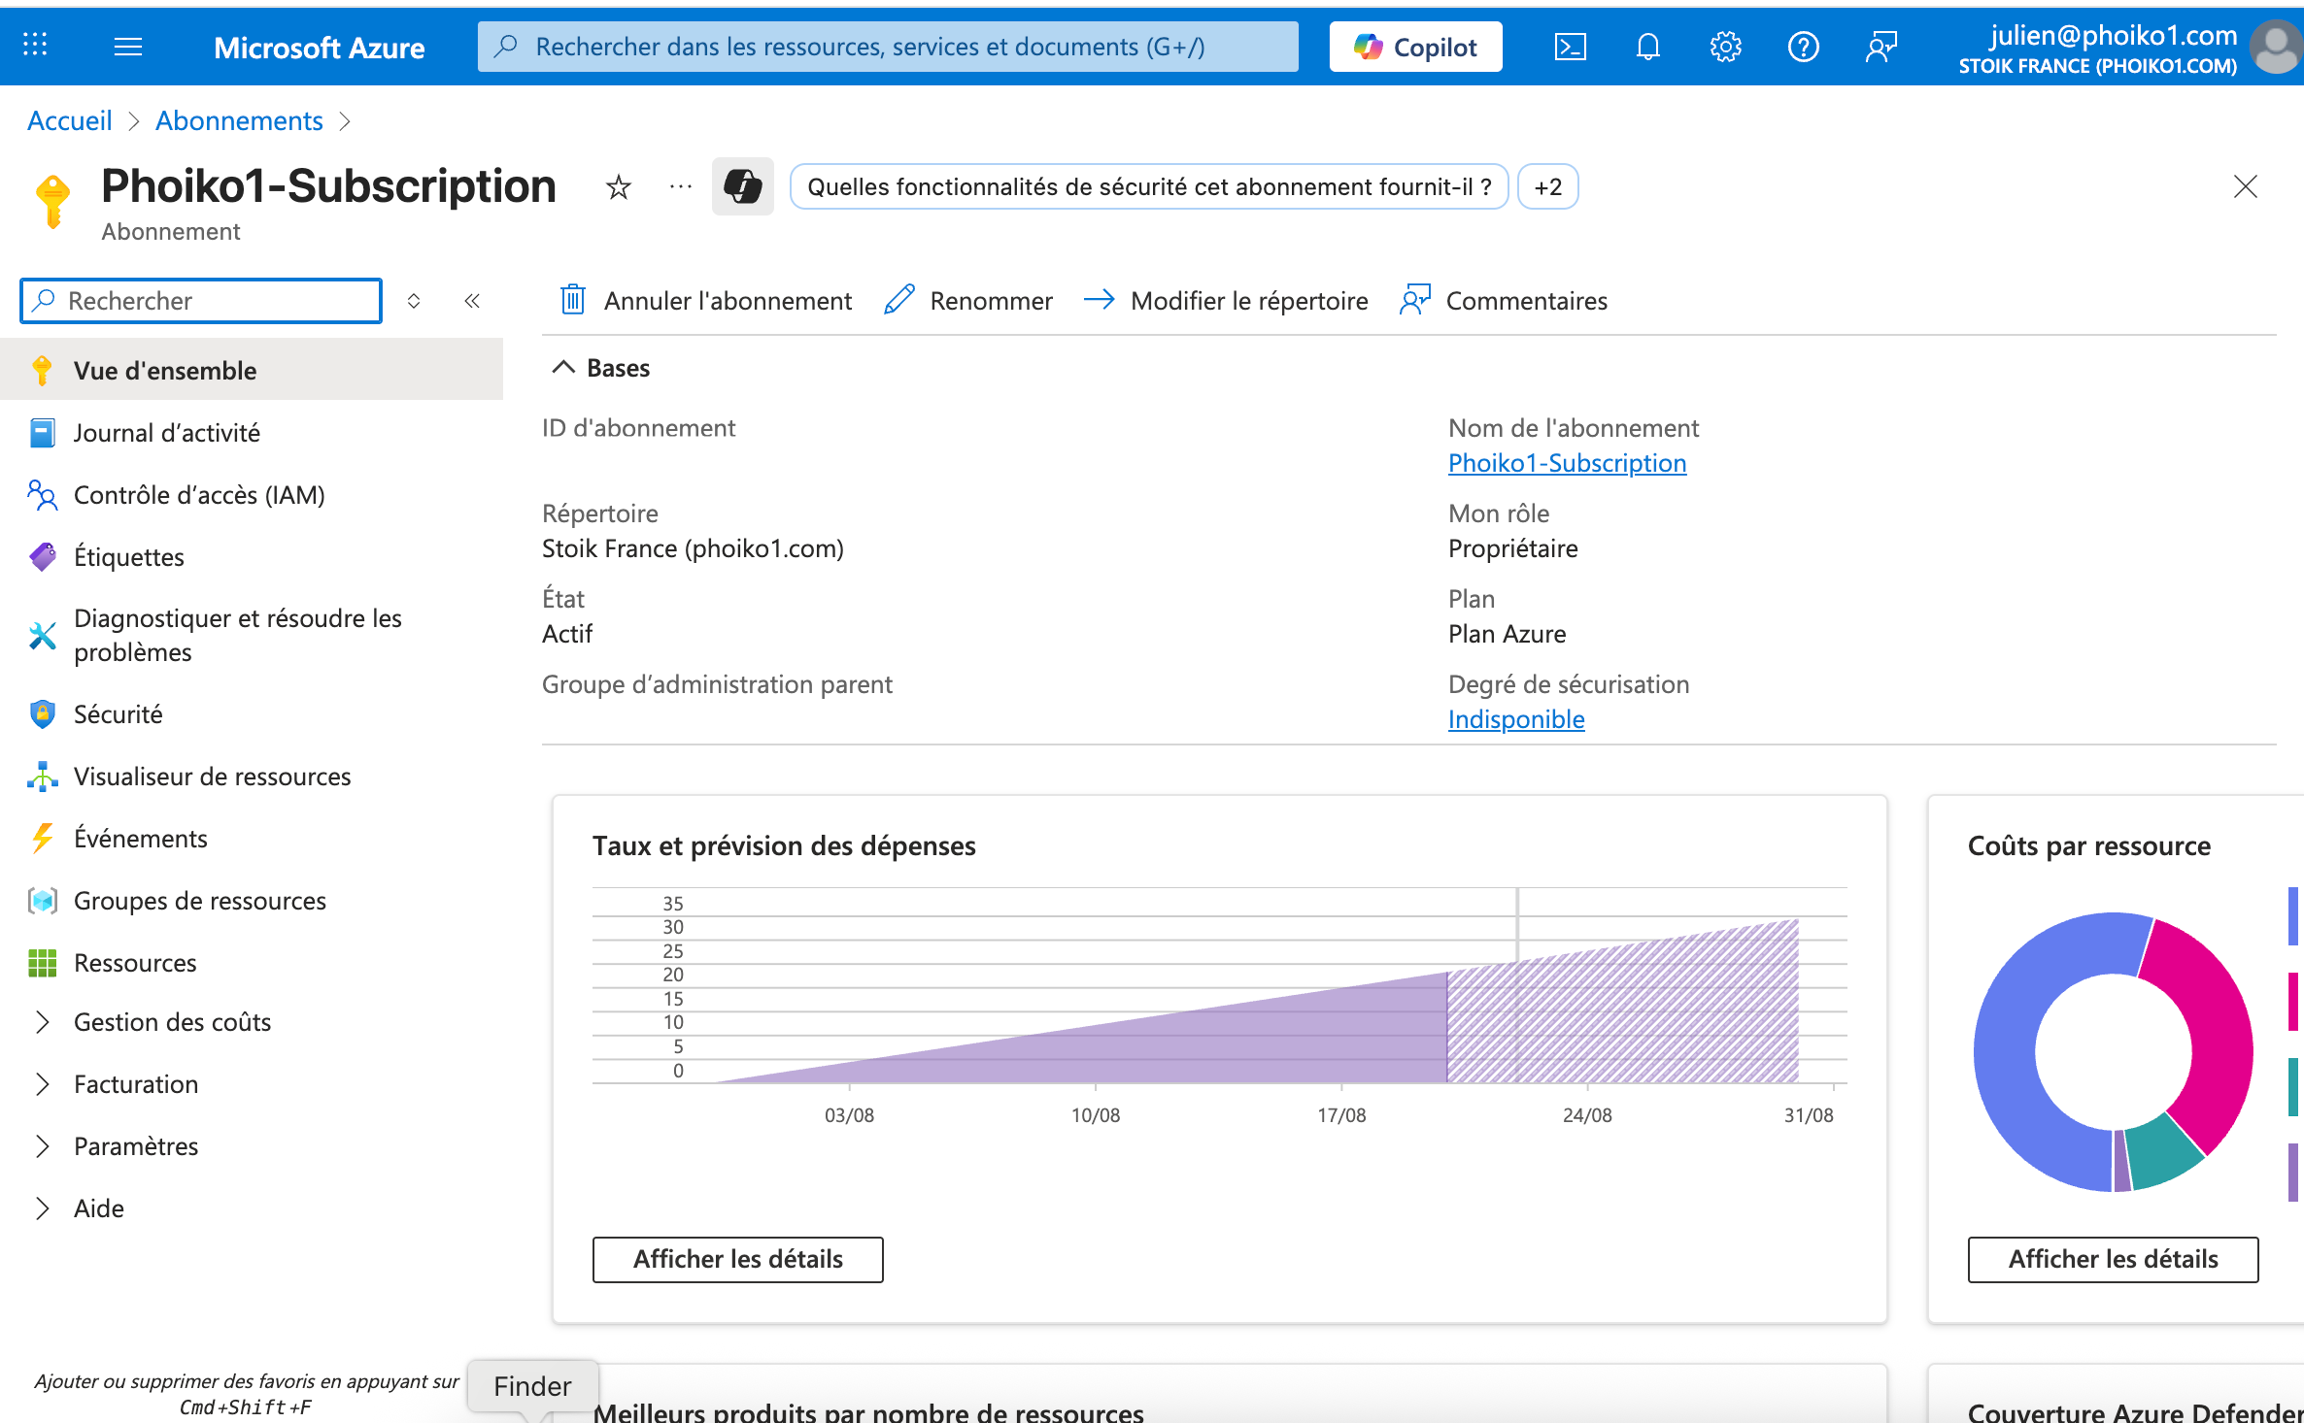
STEP 3: Click on IAM Access Control on the left tab.
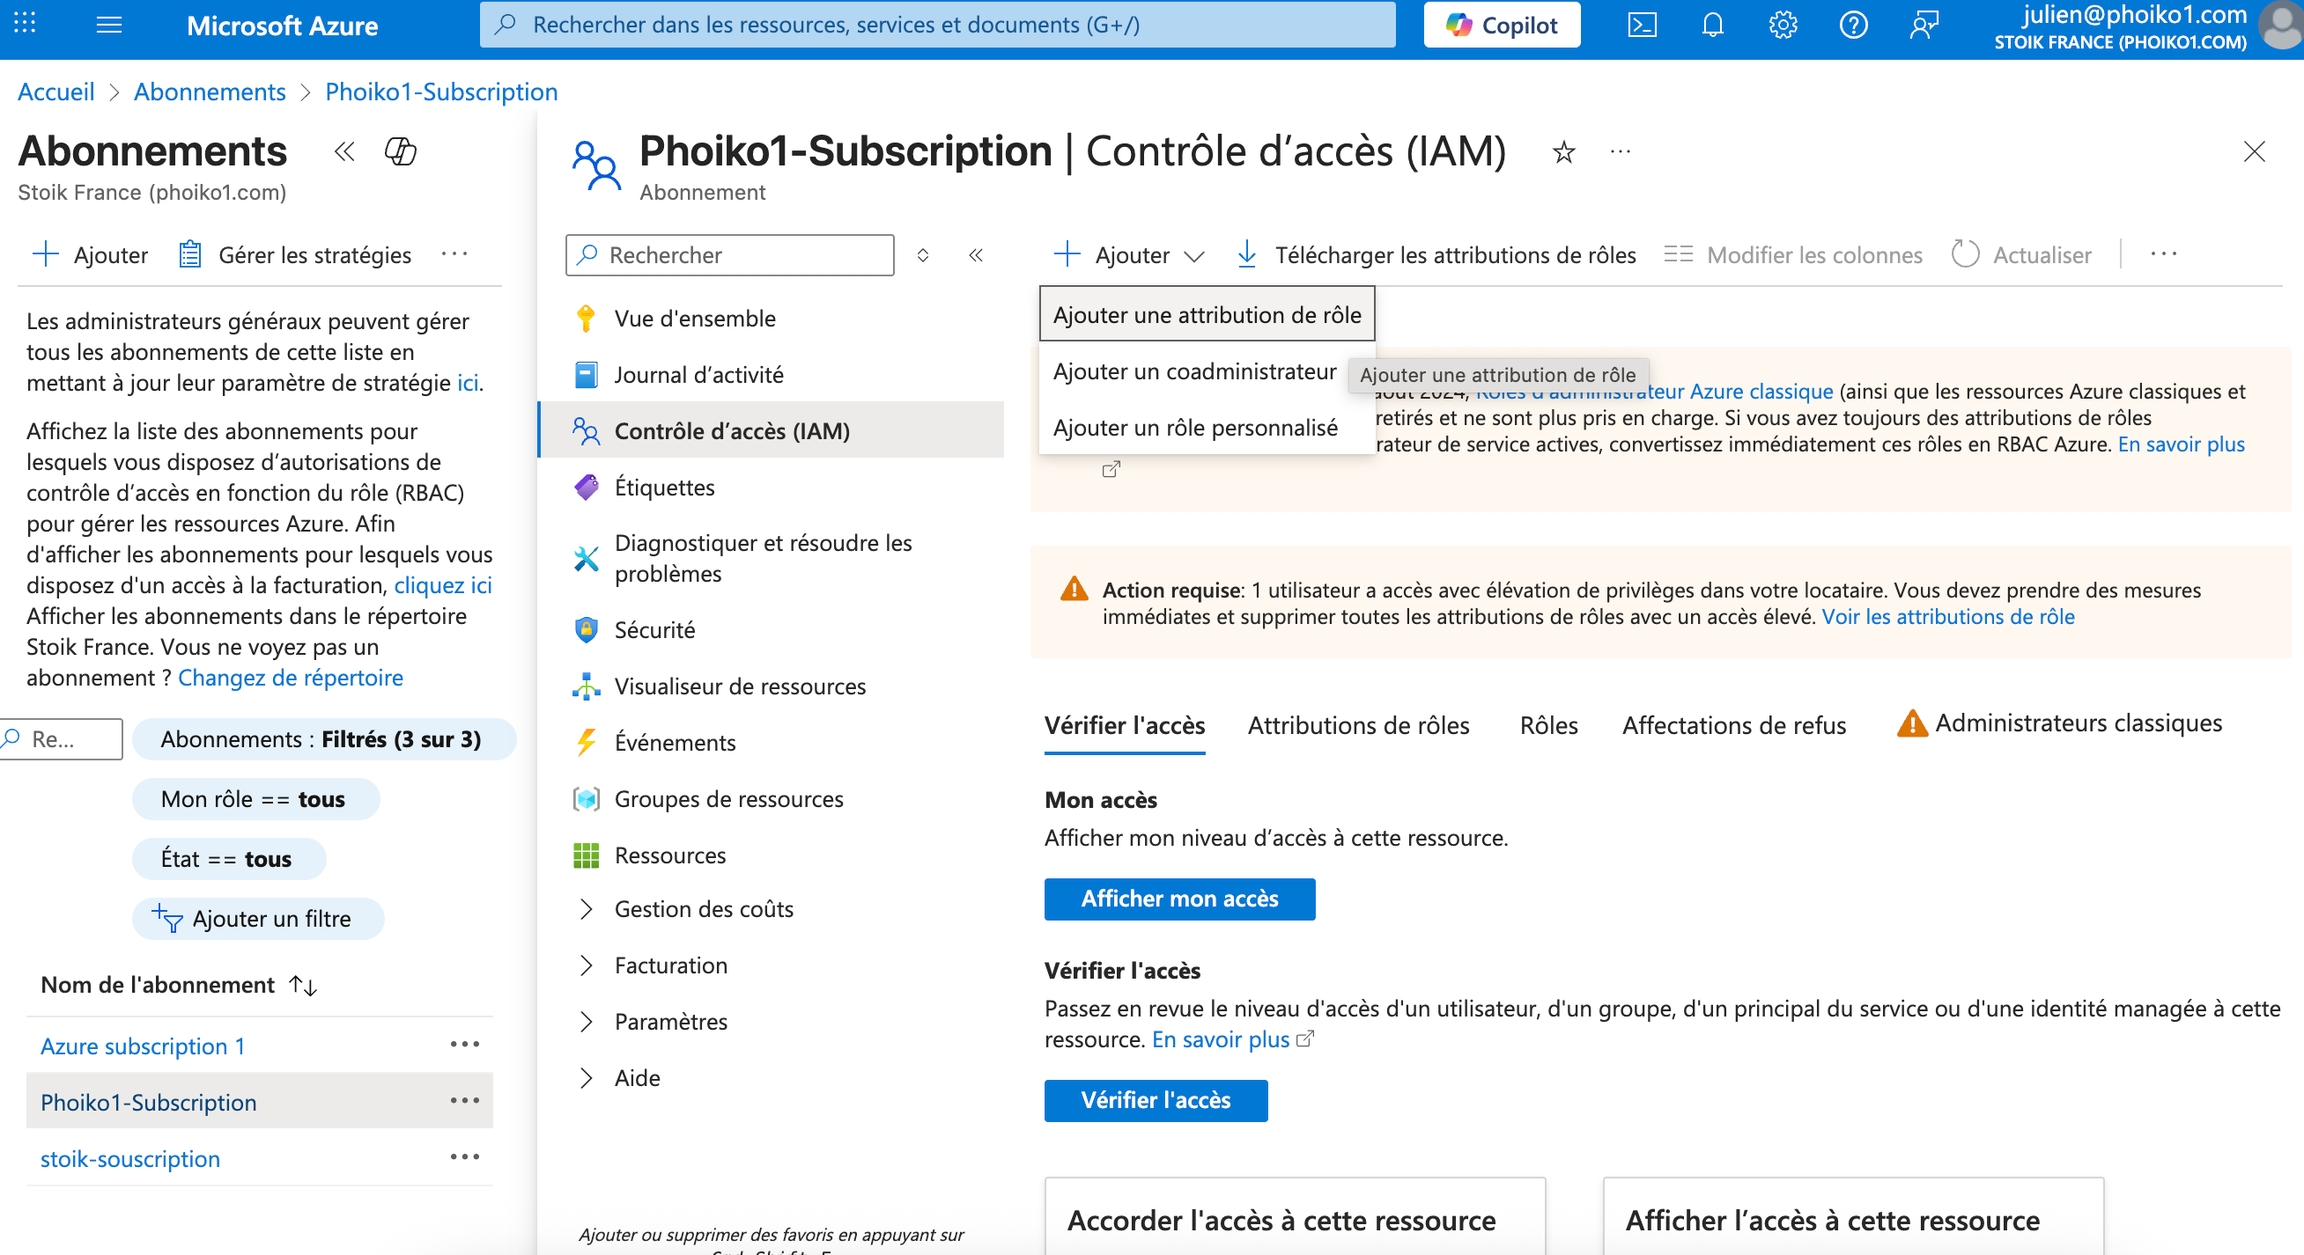
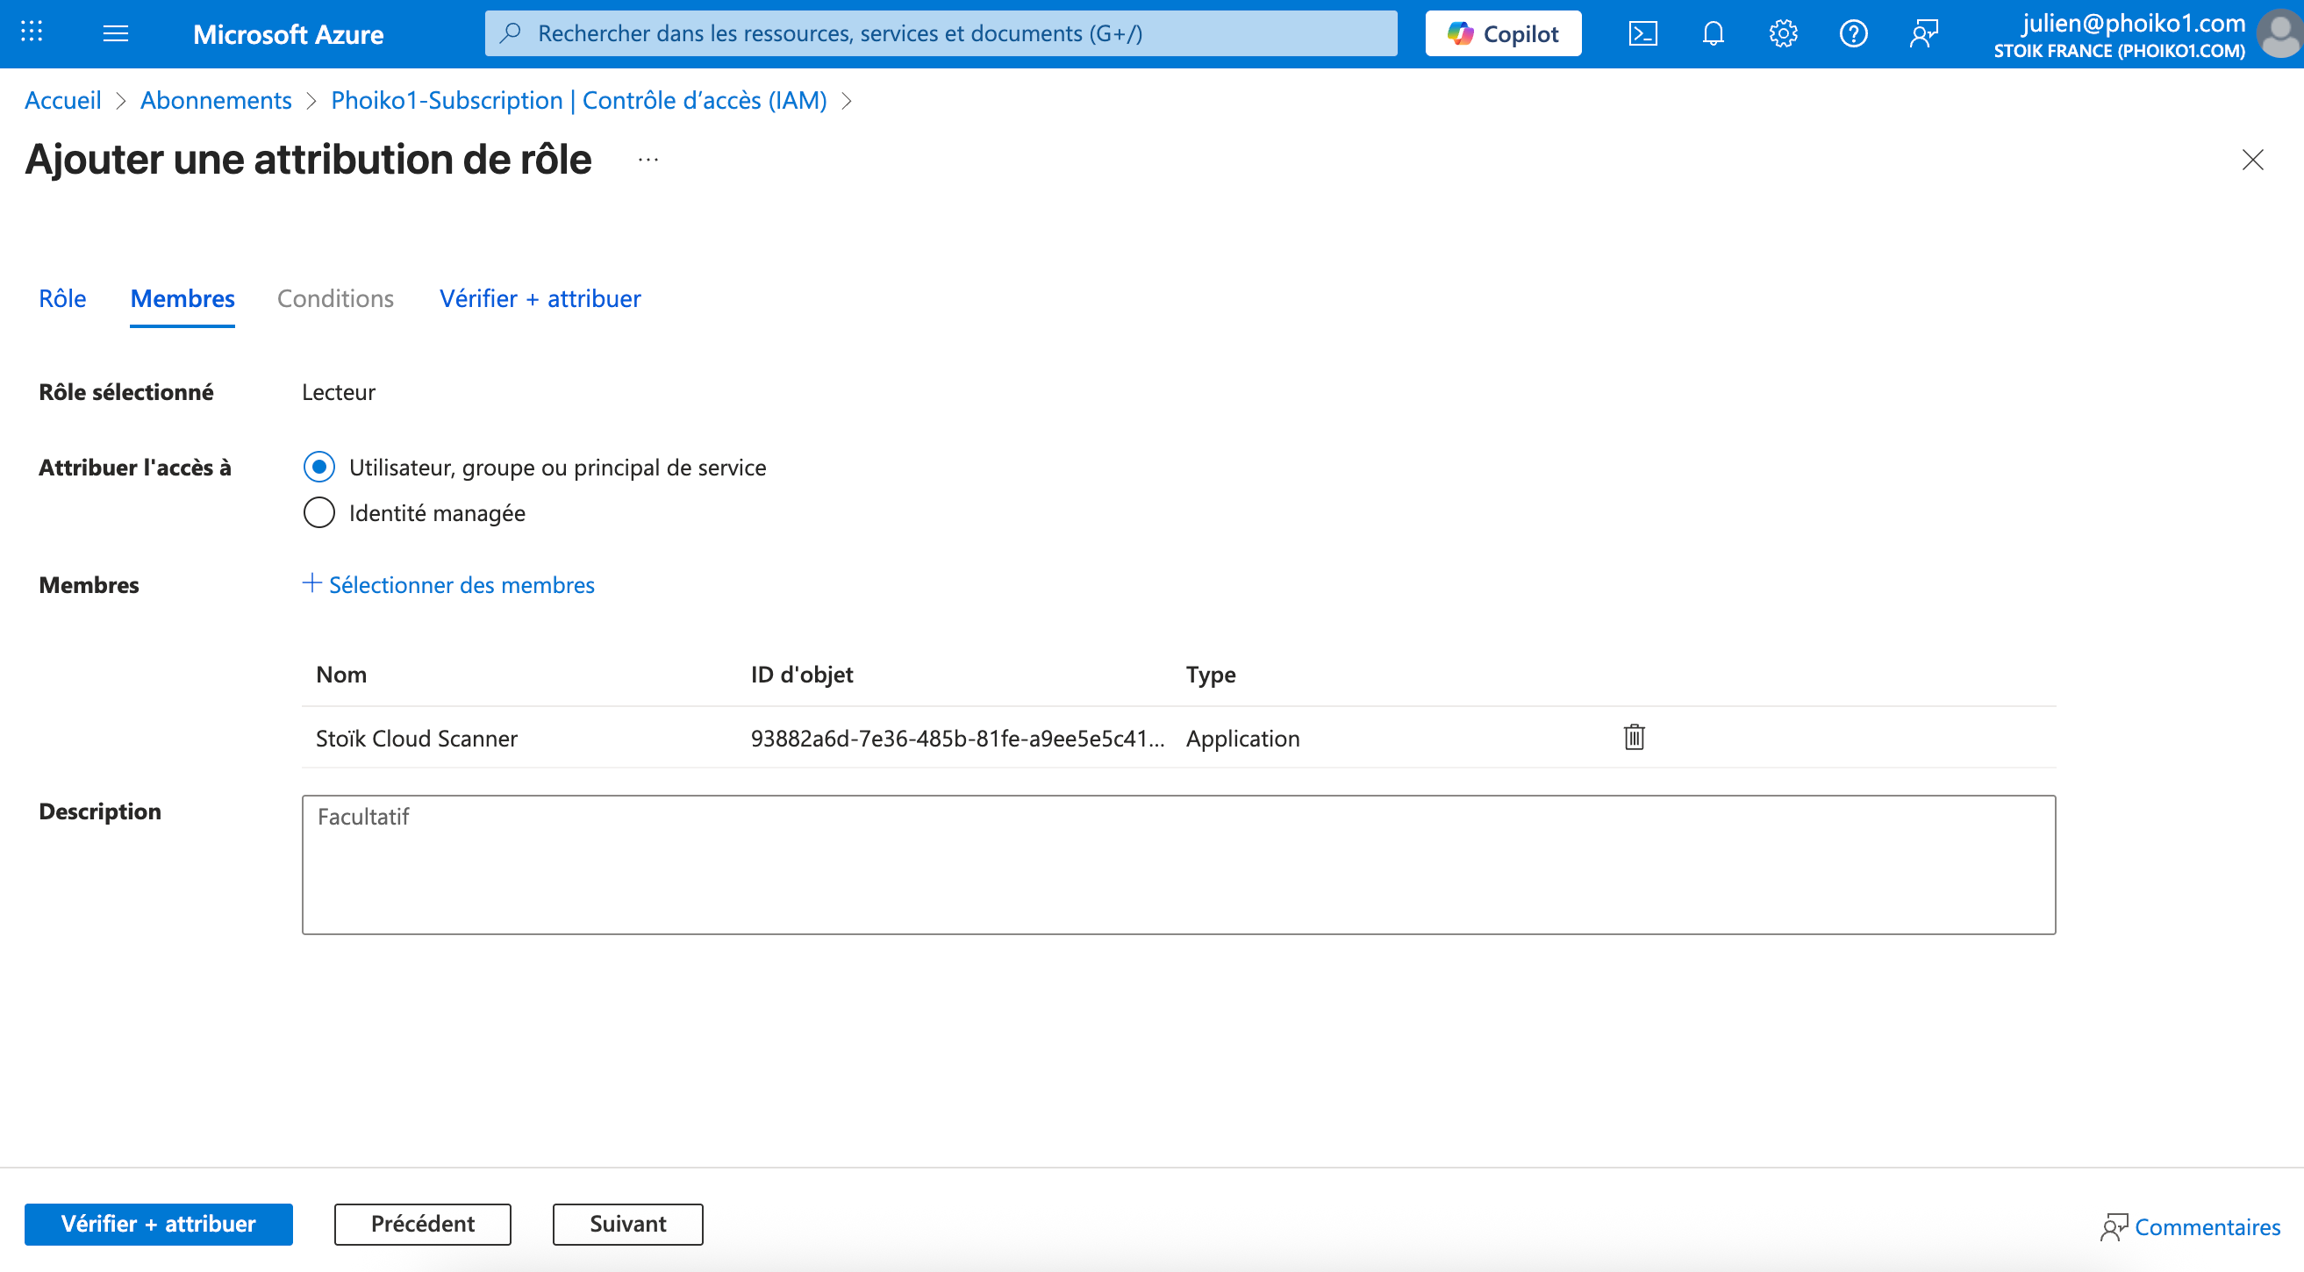
STEP 4: Click on Add, then Add Role Assignment.
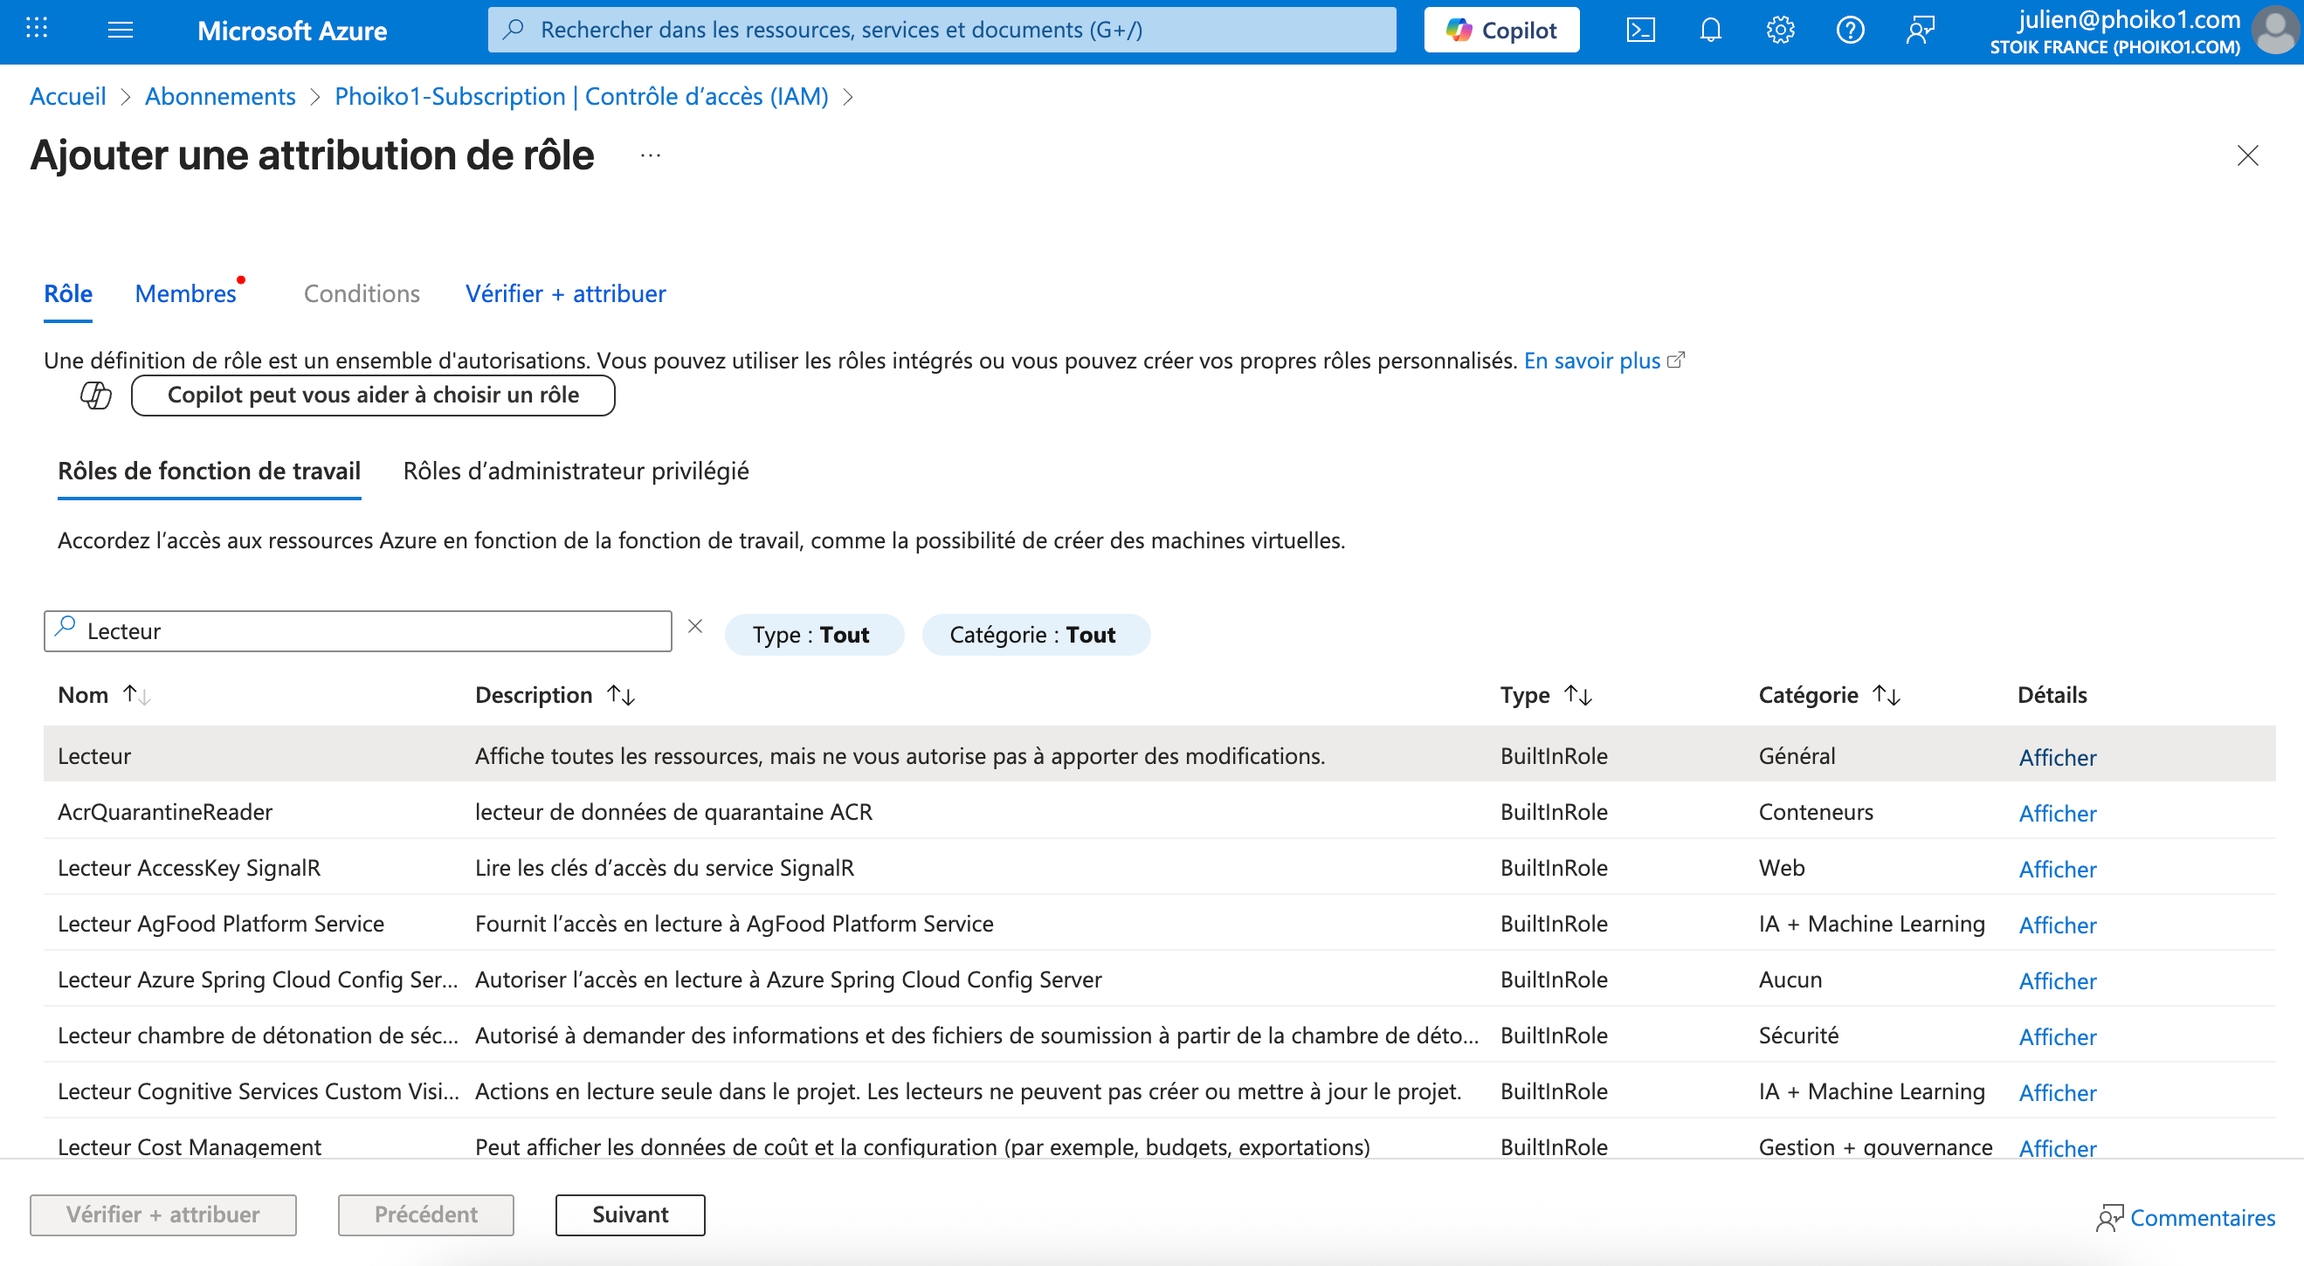
STEP 5: Search for the Reader role, select it, then click Next to go to the Members tab.
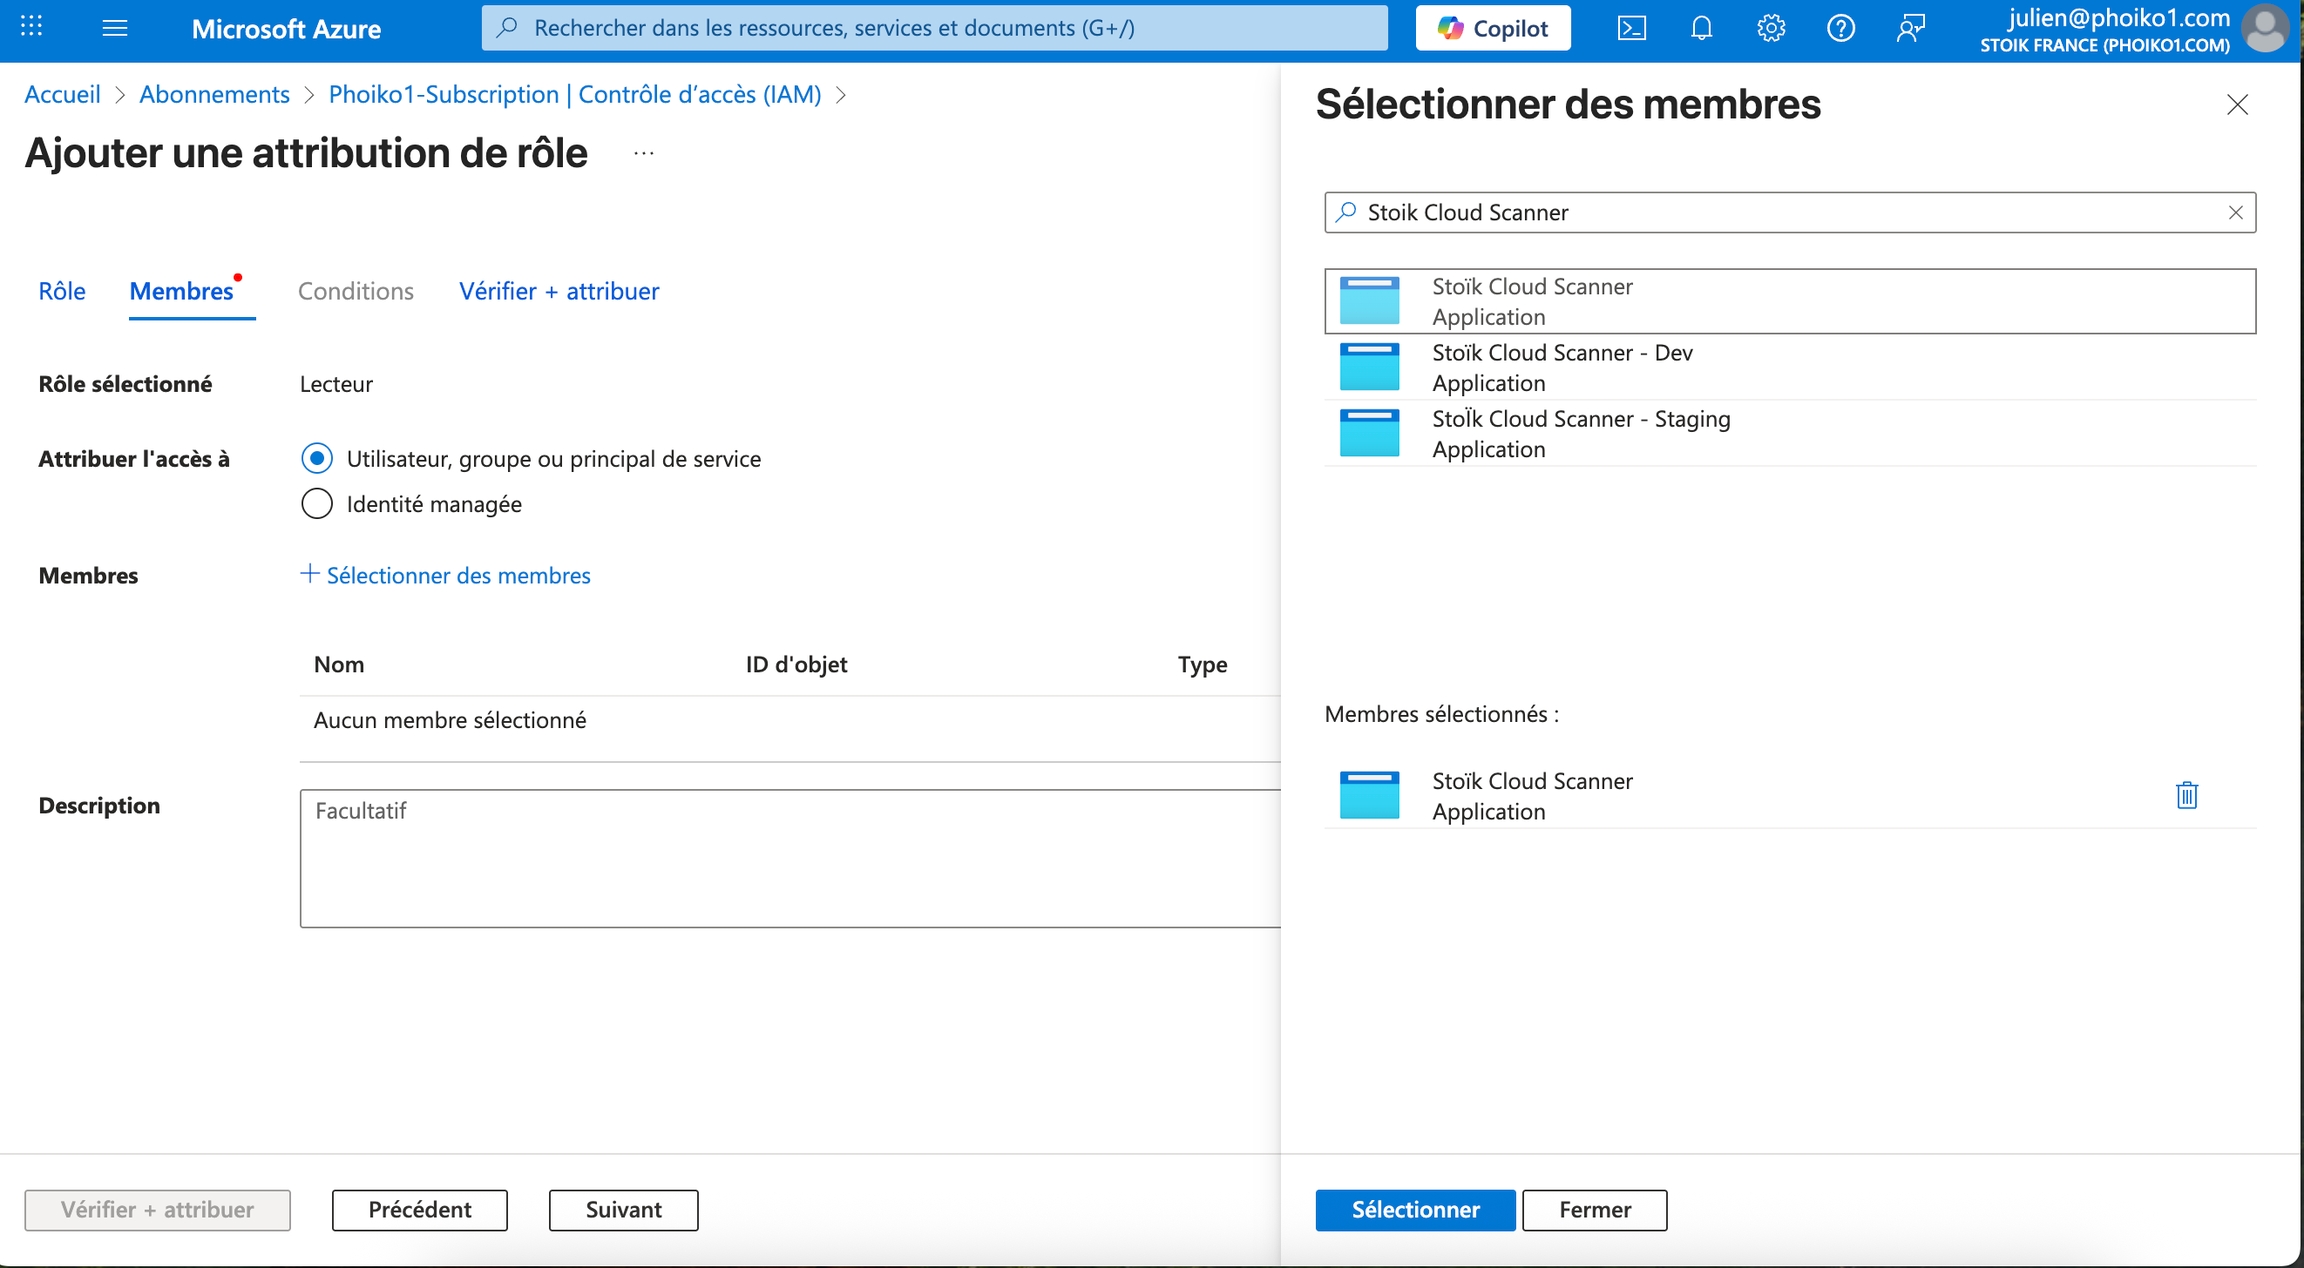
STEP 6: Click Select Members, then search for the Stoïk Cloud Scanner member. Select it, then confirm by clicking Select.
STEP 7: Double-click Verify + Assign at the bottom of the page
STEP 8: Repeat steps 4 to 7 for the Security Reader and Log Analytics Reader roles.
3. Grant permissions
Here is a summary of the steps to create new permissions
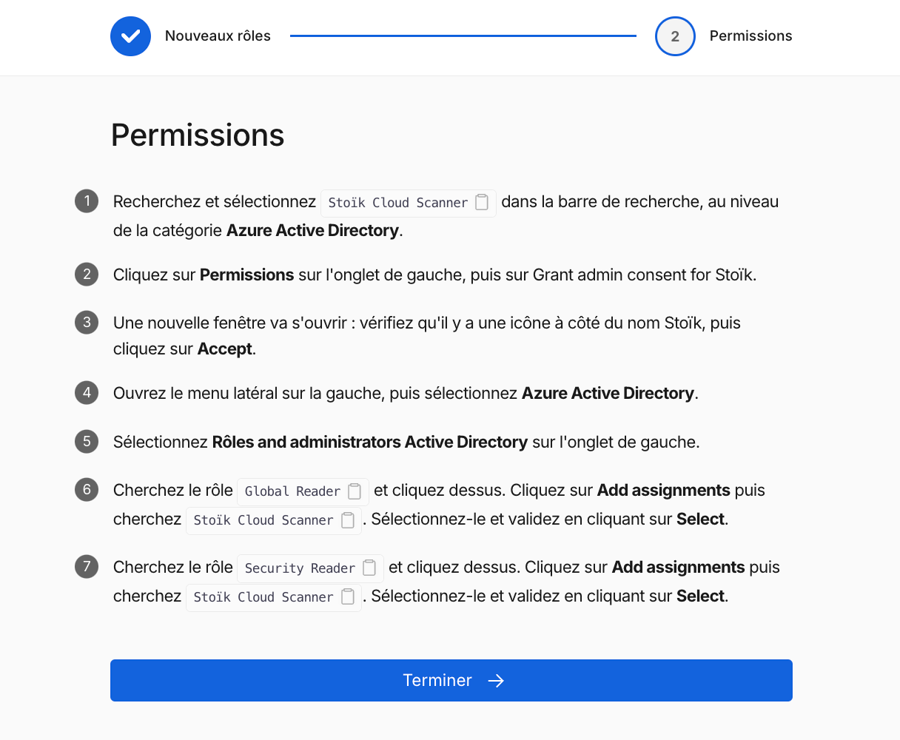
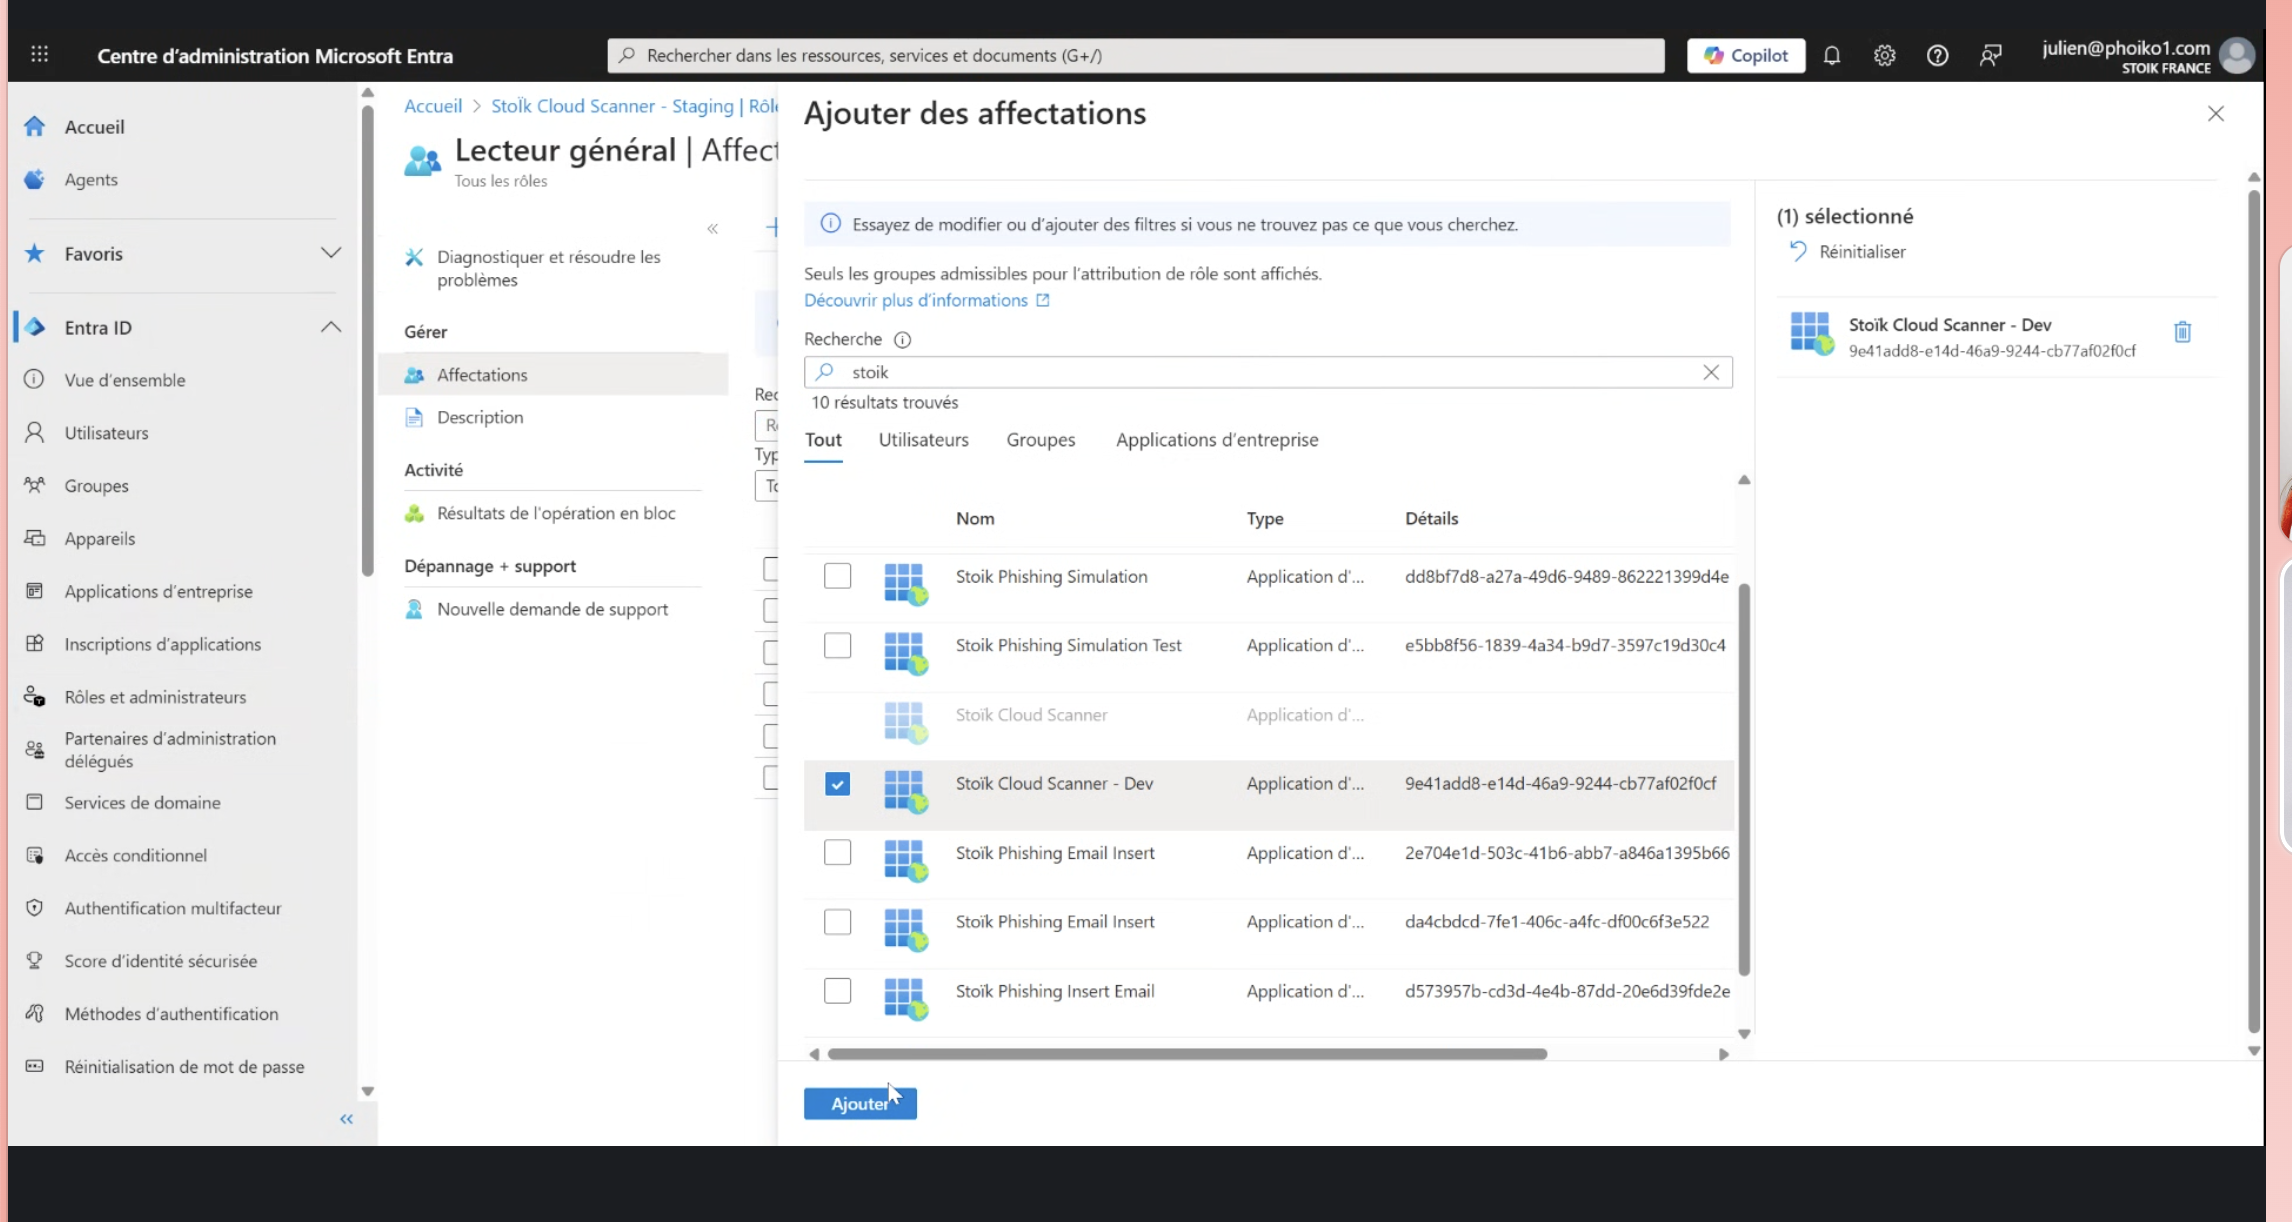
STEP 1: Open the side menu on the left, then select Roles and Administrators in the Entra ID section.
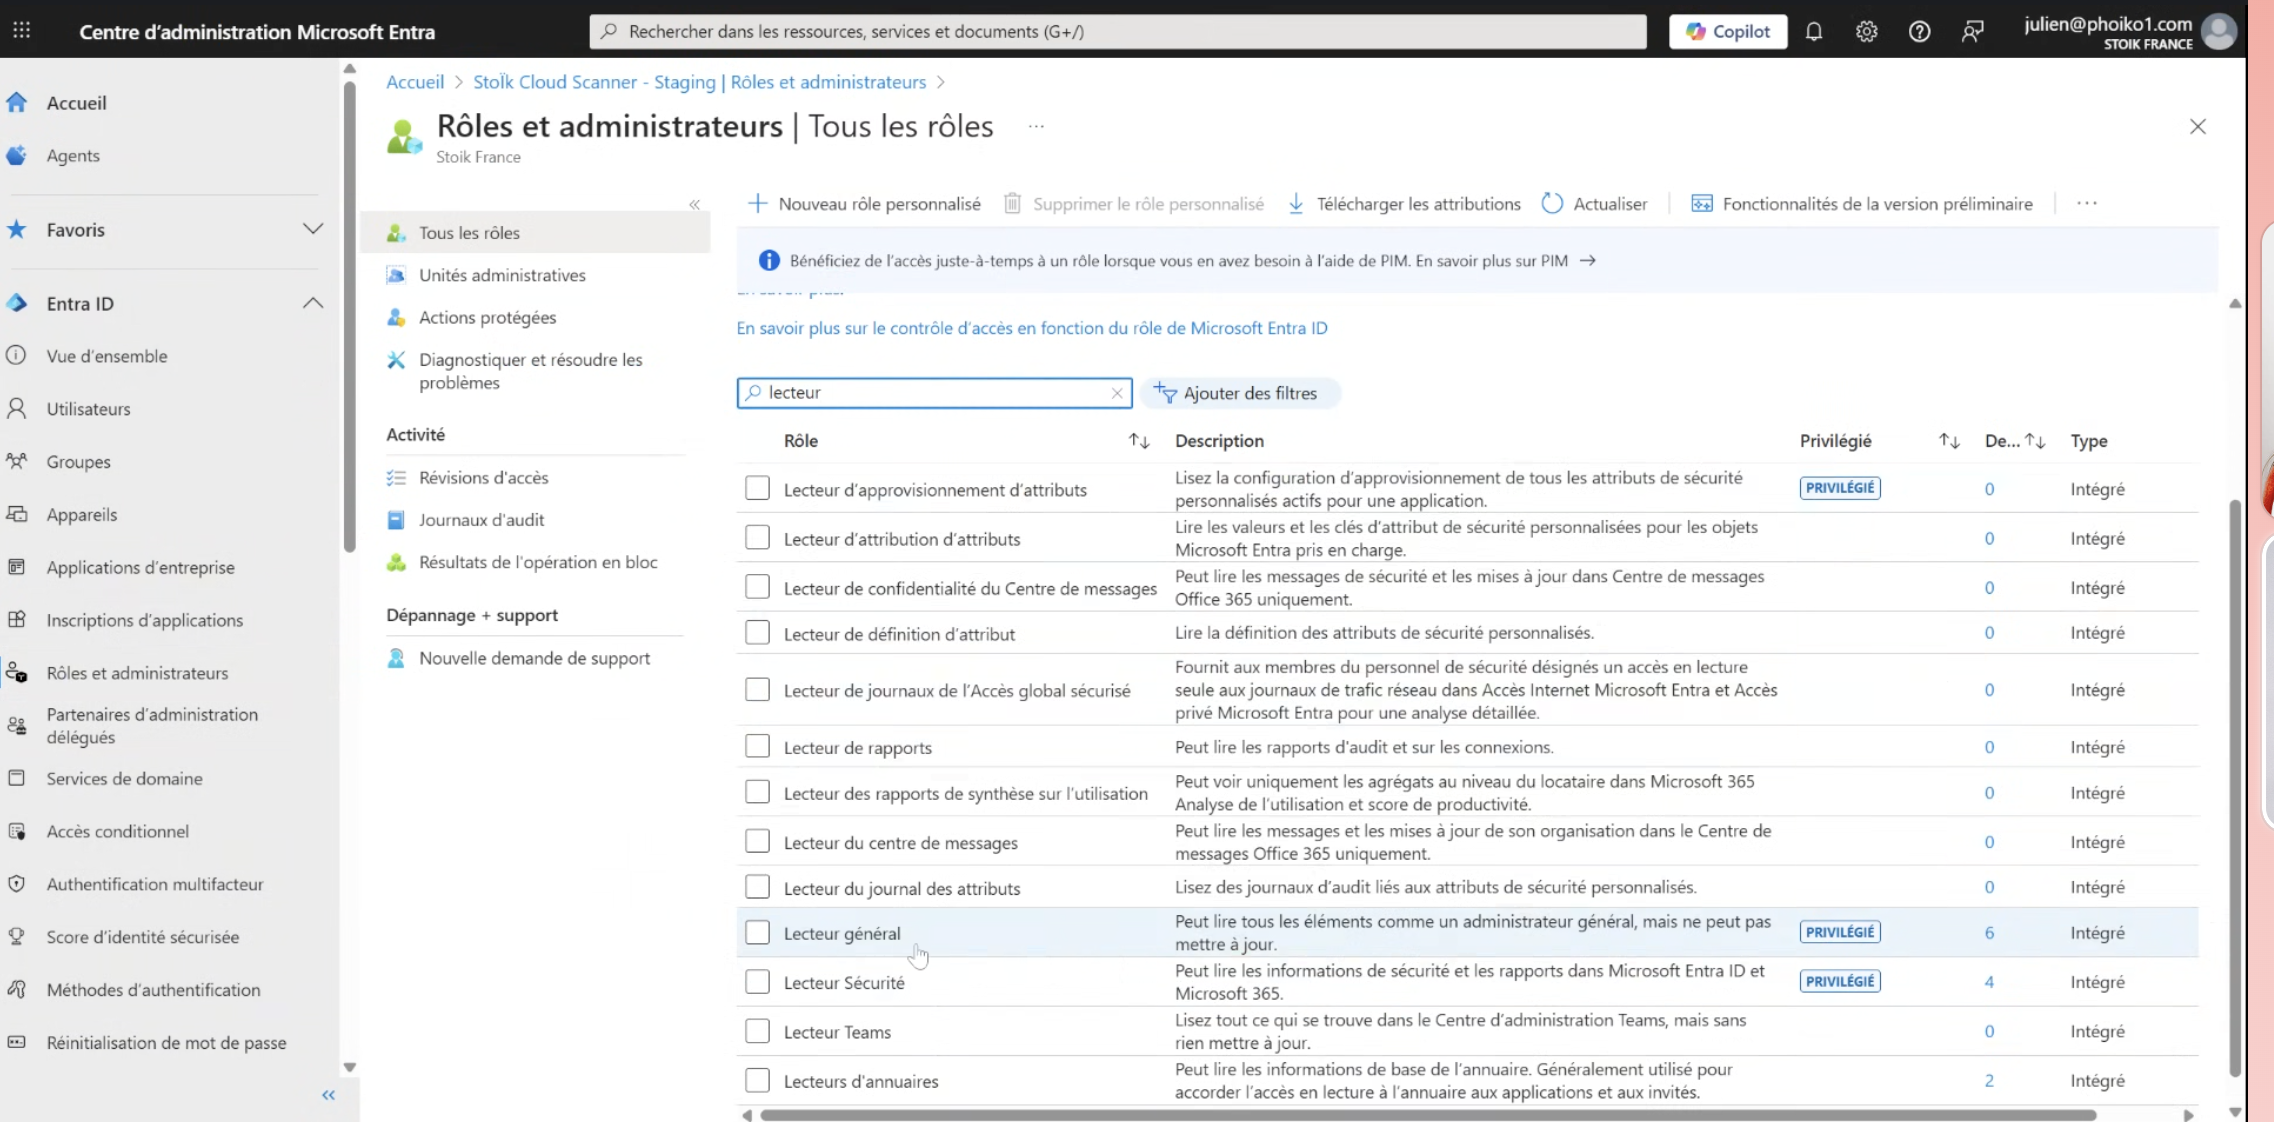
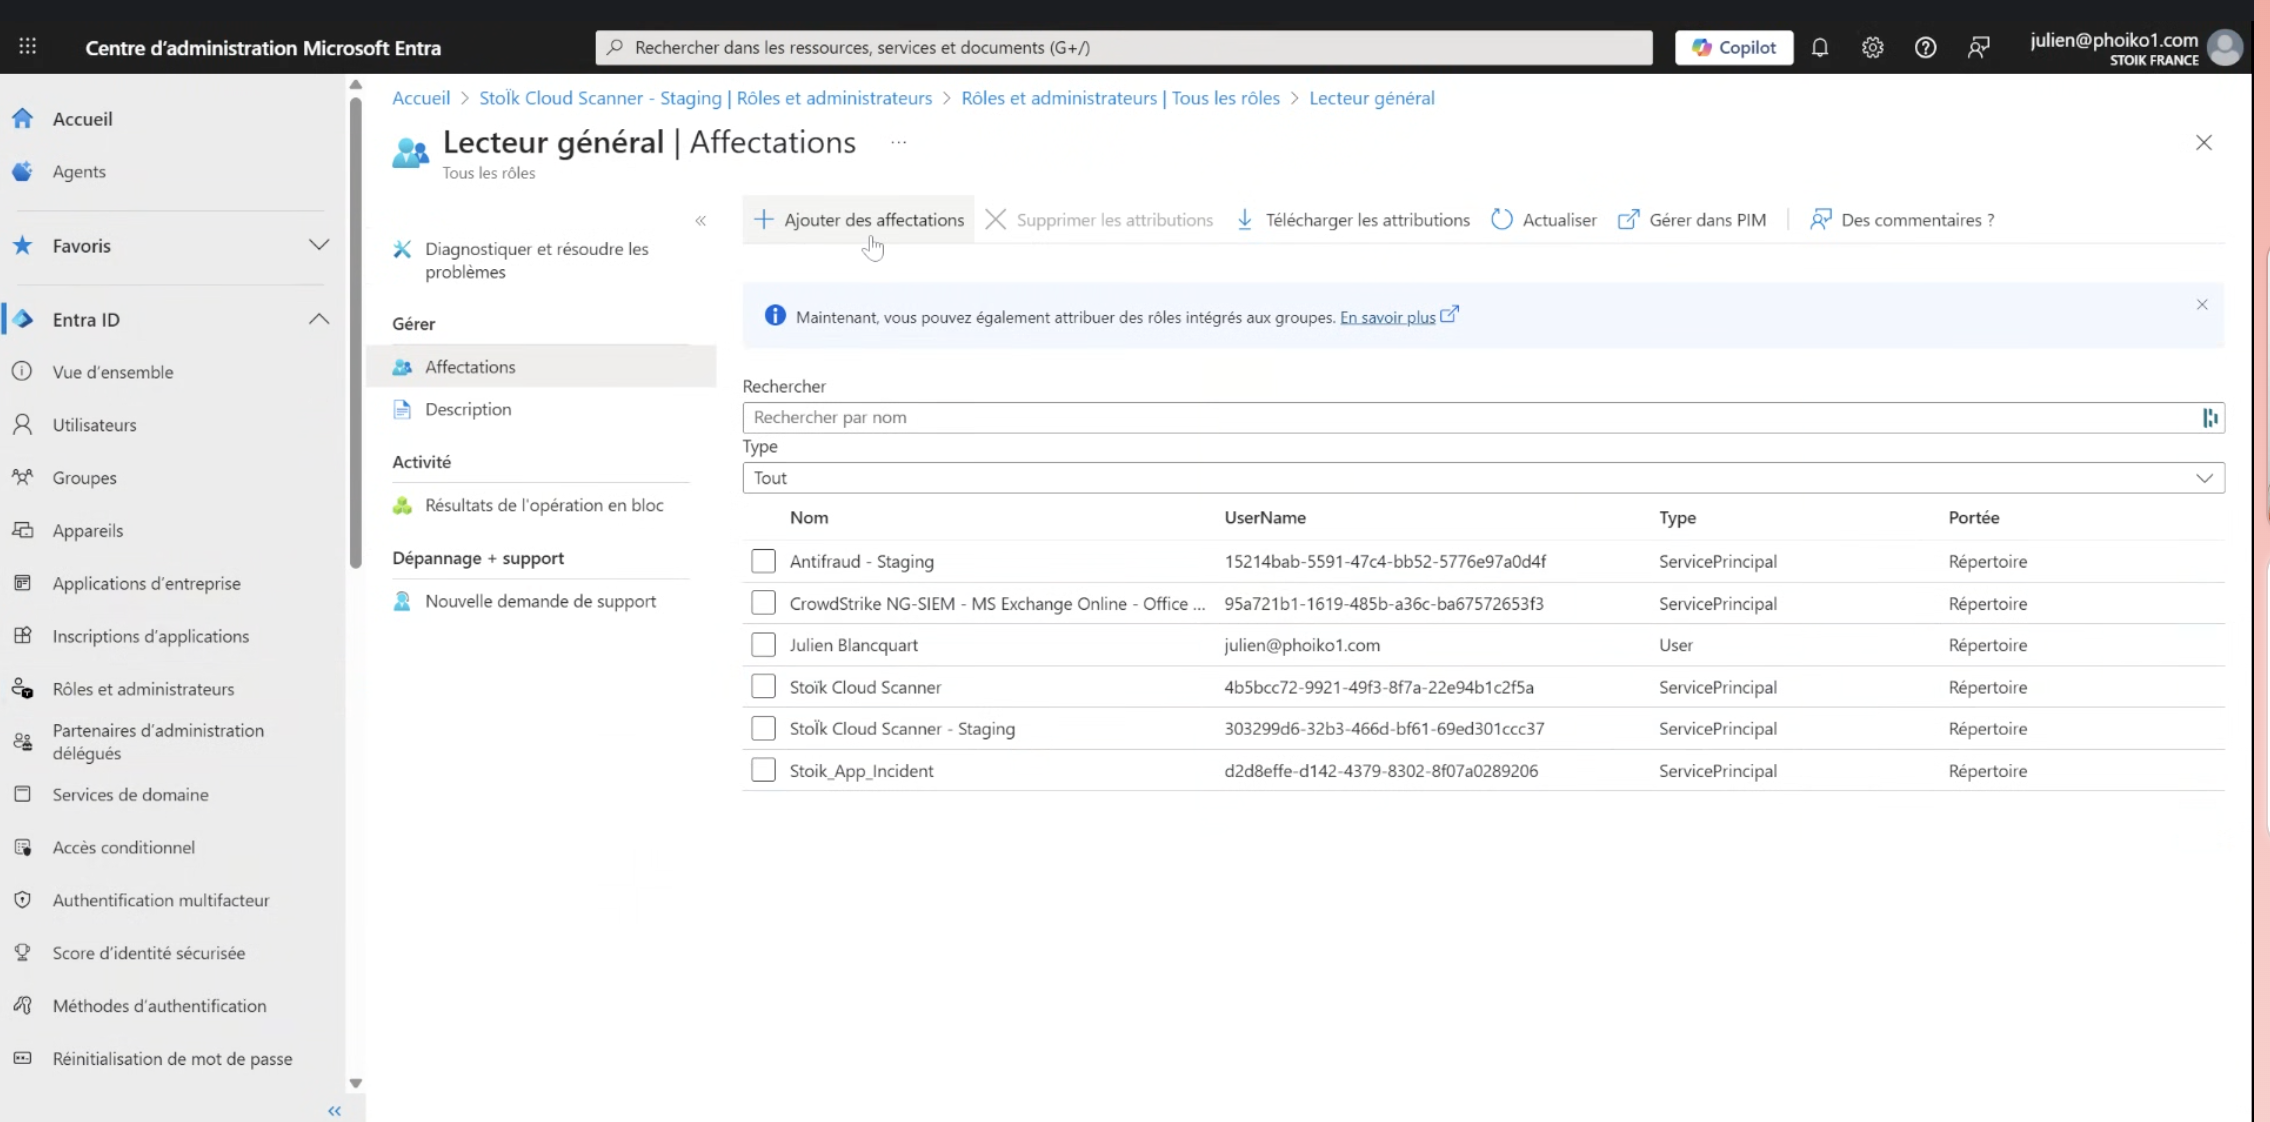
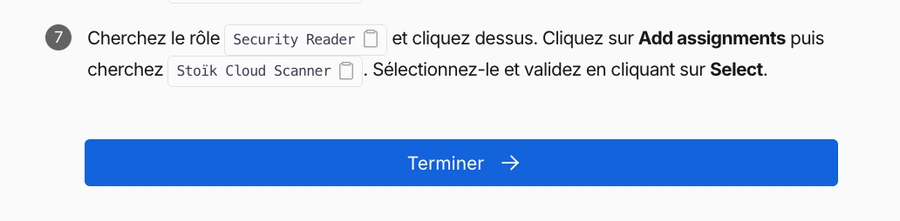
STEP 2: Search for the General Reader role and click on it. Click on Add Assignments, then search for Stoïk Cloud Scanner. Select it and confirm by clicking on Select.
STEP 3: Repeat step 6 for the Security Reader role
4. Finish Click on Finish in the Stoïk Protect consol
Refresh the Stoïk page if necessary
Last updated
Was this helpful?